.png)
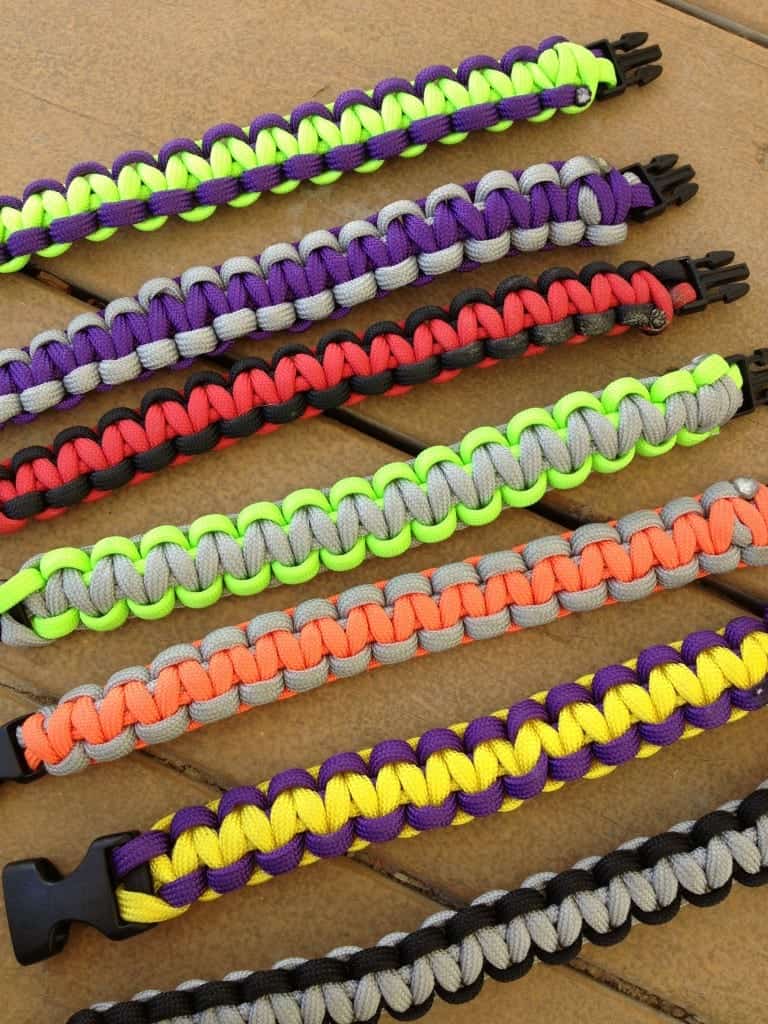
How to make paracord bracelets
How to make paracord bracelets
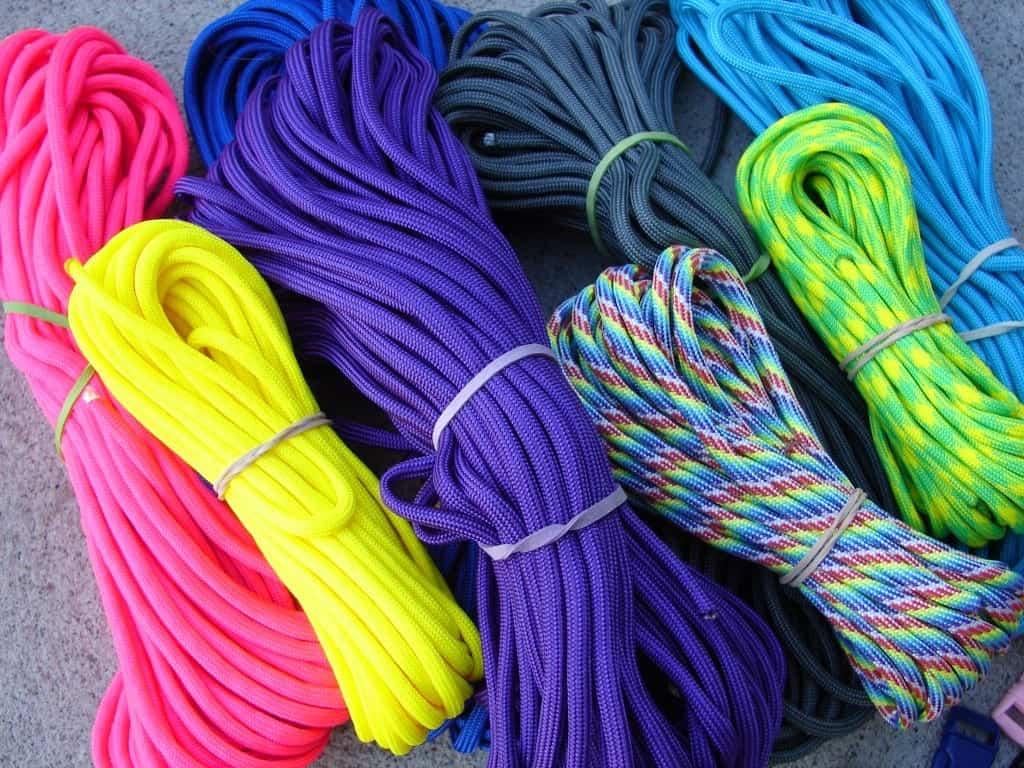
first you will need a lot of paracord and in different colors
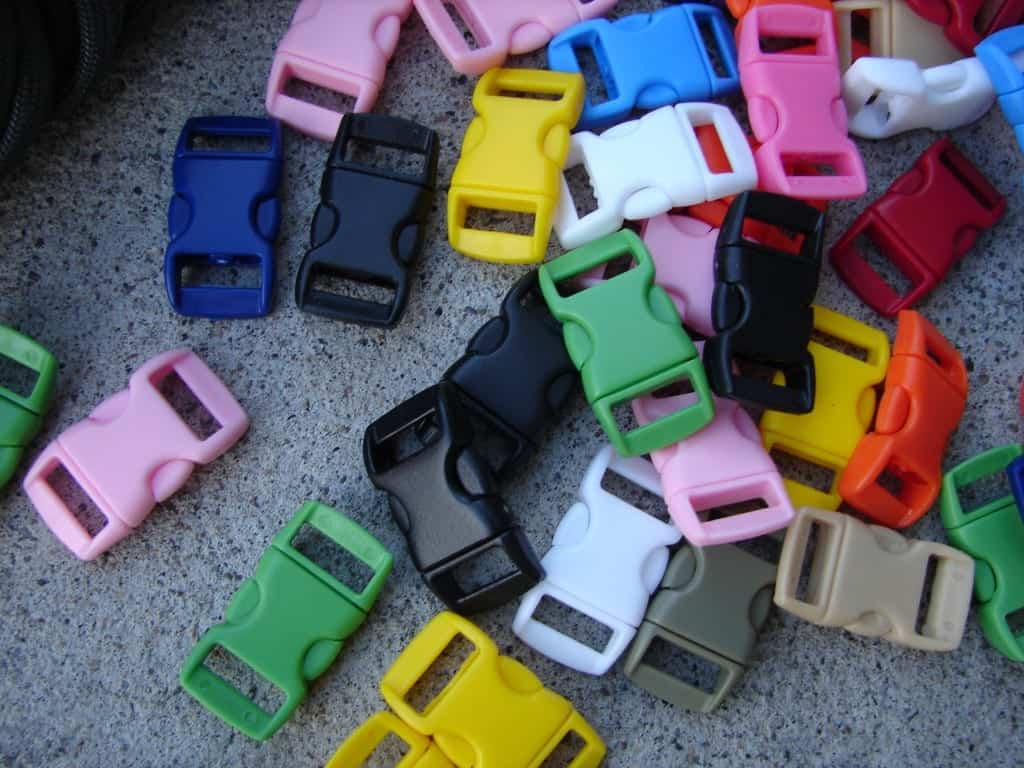
And you wil need a buckles too
the last thing you need is scissors and a candle(lighter)

now…to do one color is easy peasy.
to do two colors isn’t that hard just a bit more work.
for two colors….cut a 3 1/2 -4 foot piece
of one color and a 3 1/2-4 foot piece of the other color. you are
going to slide your fingernail along the paracord rope of one color
repeatedly. this makes the white strings on the inside come out one end
and makes a hole in the other side…

then you take the other color…and melt it a little bit with the lighter and pinch it together so it’s nice and pointy

and stick it in the whole you just made.
then melt those two suckers together really good! (you might want to get
a bowl of ice…you might burn yourself. i melt it. give it just a second
to cool and then press it together.
give it a little tug and see if it holds! if it does then let’s move on (if not..melt melt melt again!)

alright! grab your clip and let’s get started! (if you just want on color–cut a 8 inch strip and start here)

1. you are going to measure the strip in the middle and stick that folded middle piece in one side of the clasp
2.fold up the ends around the clasp and back down into the loop.
3. the burned part is pretty stiff so i always make sure it’s not on the clasp or it won’t lay flat.
4. take the ends and put them through the other side of the clasp (make sure they aren’t twisted)
you are going to pull these up until they are about an inch bigger than your wrist
5. undo clasp (this is tricky if you are
making this for yourself to undo the clasp so if you have a friend
around have them help you…make sure to hold the cord and the clasp so it
stays the correct size.
6. you are going to immediately start the
braiding…the first one is super tricky cause you have to hold the clasp
and make sure it doesn’t move…i always do this first on for my kids
just to make sure…but picture 6 is how you want your bracelet to look…
let’s move on how to braid it!!!
if you have ever done friendship bracelets this will be pretty easy for you!
when doing two colors you need to make
sure two things. you always start with the same color…(like i will
always start with my light blue one) and that the clip is always on the
same side…it will be twisted if you don’t (it can be fixed though!)
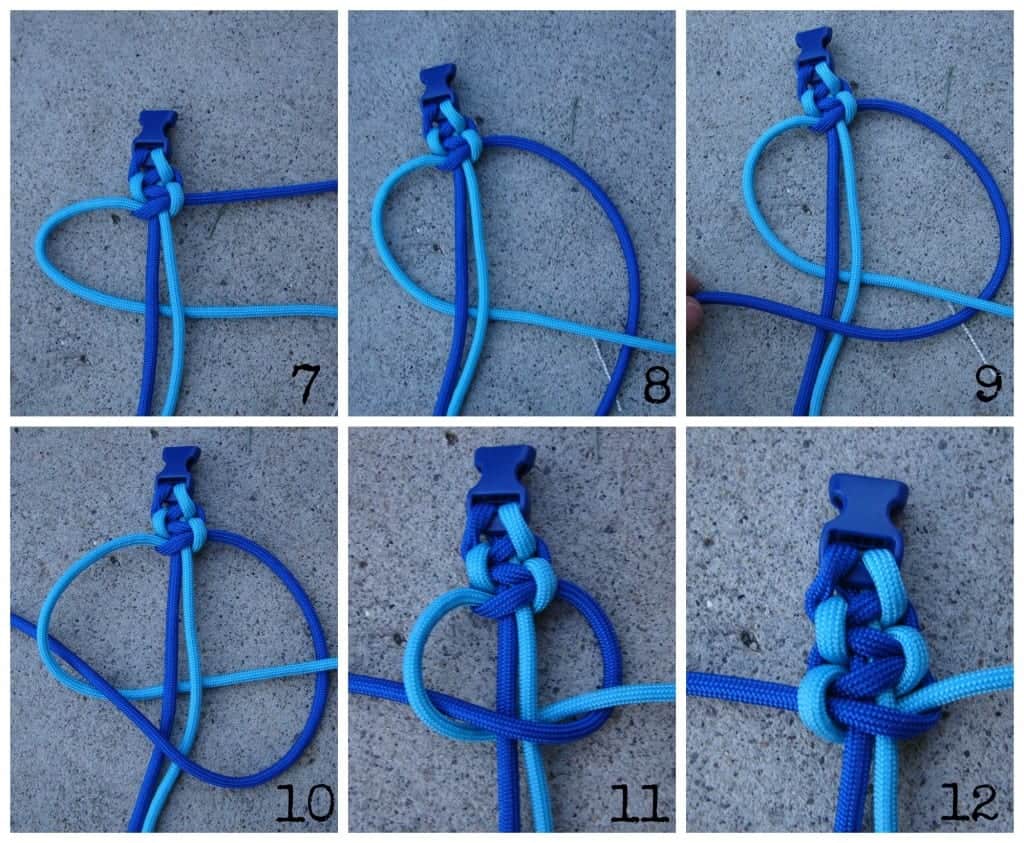
7. you make a loop (light blue) and put it behind the two middle pieces.
8. the dark blue on the other side goes behind the light blue piece you just brought over.
9 and now that dark blue piece goes up over the two middle pieces
10 and down the loop you just made
11. then slowly pull both sides up
12 until nice and tight

and repeat!
14 –make loop (remember…always start with the same color) so my light
blue is now on the right and i make a loop and put it behind to the
other side
15. then under …over …and through.
pull up and tighten.

16. repeat repeat repeat.
when you get the end..and if you still
have cord…you can usually shove up the braided part to make it nice and
tight and fit a few more braids.
(if it doesn’t look right..unbraid to the point it got messed up and do it again…
17…when you are out of string or room..
check to make sure it fits your wrist. if it doesn’t fit…..you need to
unravel it all the way and start at the beginning (step 4) (think of it
as awesome practice)
if it fits you are going to snip off the excess of one color..and melt the end
18 .and take your finger(or stick) and melt it into the braid.
(turn over and repeat with the other color!) make sure they are nice and melted!
(i save the ends if they are longer than a foot–cause you could make a little keychain thing with them!)
if you stayed with one color and made
sure the clasp stayed on the same side the whole time you will have one
color on the inside all the way down…and if you flip it over –that same
color will be the outside pieces…


0 comments: