How to create a Flower from Plastic Spoons

How to create a Flower from Plastic Spoons
to create a plastic spoons flower you will need
The next step is to Light the candle and stick it onto a firm base. To do this hold the lighted candle horizontally a little above the base. Drops of wax will fall down. When they do, stick the base of the candle onto the base you want to stick it on.

Step 3.Hold the back of the head of the spoon horizontally towards the flame. When the sides start curling up, take it off the flame.
Step 4.Now hold the other side of the spoon's head towards the candle, not for long, just to blacken the other side as well.
And now Do the same for as many spoons as you want. (about 5 spoons should be sufficient) 
The next thing you need to do is to take two of the spoons you make and stick their necks together by putting one spoon over another in a criss-cross way. slightly melt the point of intersection for the spoons to bond. Snip off only ONE of the handles of one of the spoons.
 
 and
Do the same for the remaining spoons.
After you have stuck all the petals, take one of the handles of the spoons you have snipped of and slightly melt the bottom bit and attack it to your flower like a stem. If you prefer it without a stem, you may skip this step.
Very slightly burn the stem to make it look like the rest of the flower.
And you are done


How to make paracord bracelets

How to make paracord bracelets


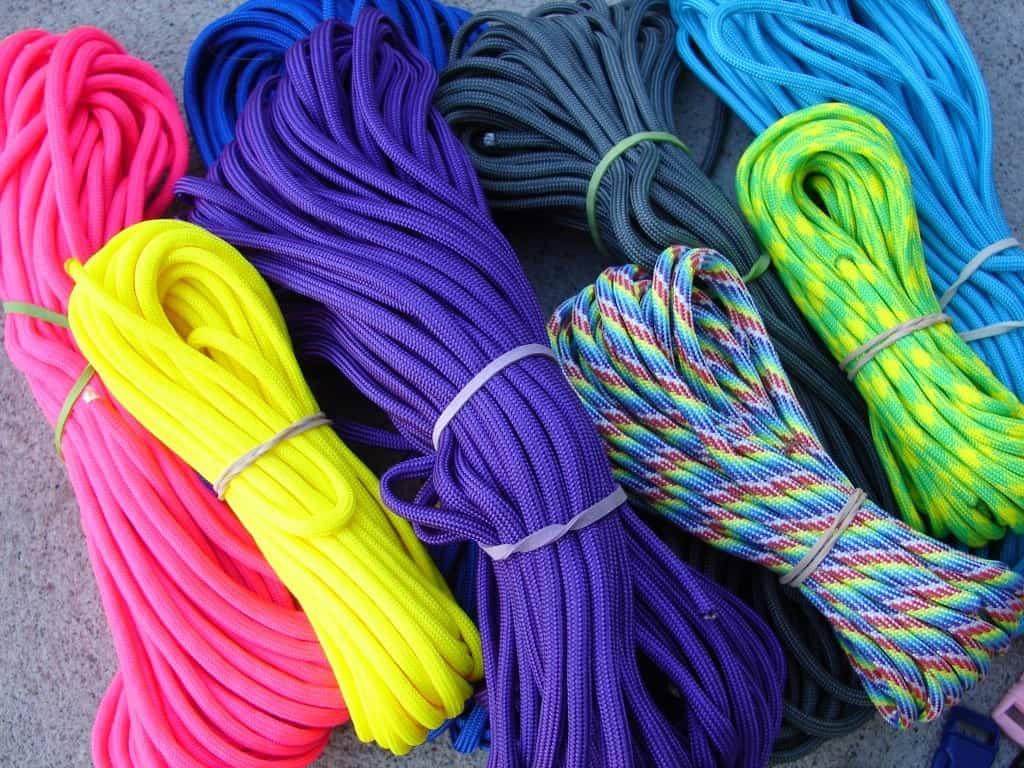
 first you will need a lot of paracord and in different colors 

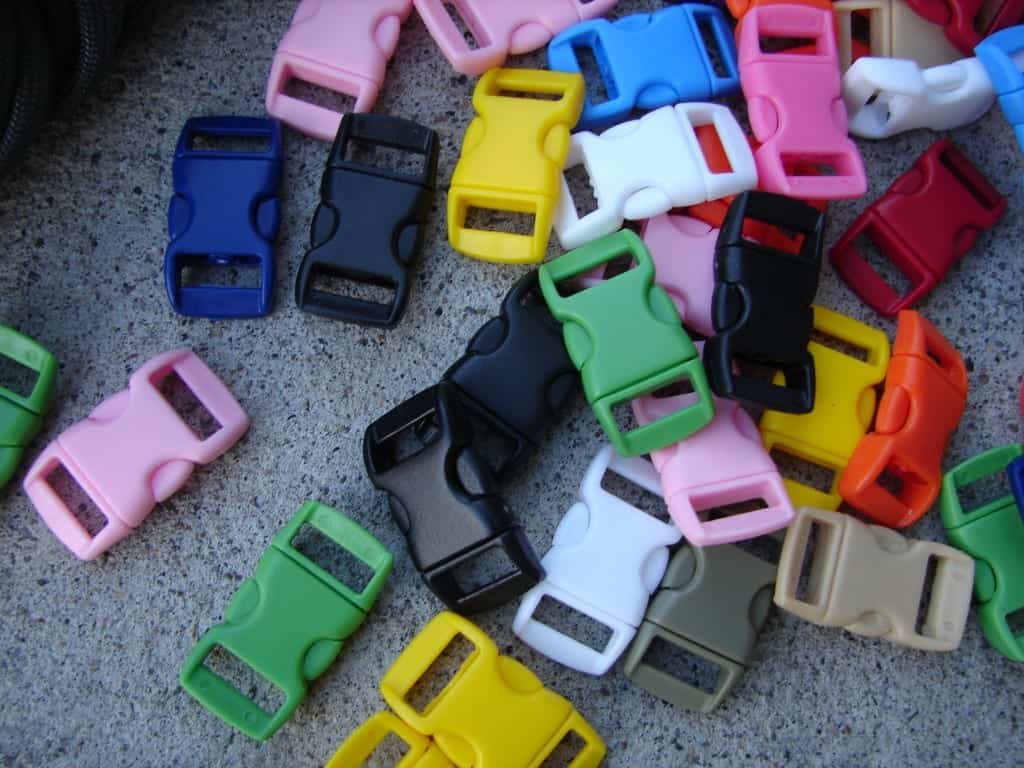
And you wil need a buckles too
 the last thing you need is scissors and a candle(lighter)
now…to do one color is easy peasy.
to do two colors isn’t that hard just a bit more work.
for two colors….cut a 3 1/2 -4 foot piece of one color and a  3 1/2-4 foot piece of the other color. you are going to slide your fingernail along the paracord rope of one color repeatedly. this makes the white  strings on the inside come out one end  and makes a hole in the other side…
then you take the other color…and melt it a little bit with the lighter and pinch it together so it’s nice and pointy
and stick it in the whole you just made. then melt those two suckers together really good! (you might want to get a bowl of ice…you might burn yourself. i melt it. give it just a second to cool and then press it together.
give it a little tug and see if it holds! if it does then let’s move on (if not..melt melt melt again!)

 alright! grab your clip and let’s get started! (if you just want on color–cut a 8 inch strip and start here)
1. you are going to measure the strip in the middle and stick that folded middle piece in one side of the clasp
2.fold up the ends around the clasp and back down into the loop.
3. the burned part is pretty stiff so i always make sure it’s not on the clasp or it won’t lay flat.
4. take the ends and put them through the other side of the clasp (make sure they aren’t twisted)
you are going to pull these up until they are about an inch bigger than your wrist
5. undo clasp (this is tricky if you are making this for yourself to undo the clasp so if you have a friend around have them help you…make sure to hold the cord and the clasp so it stays the correct size.
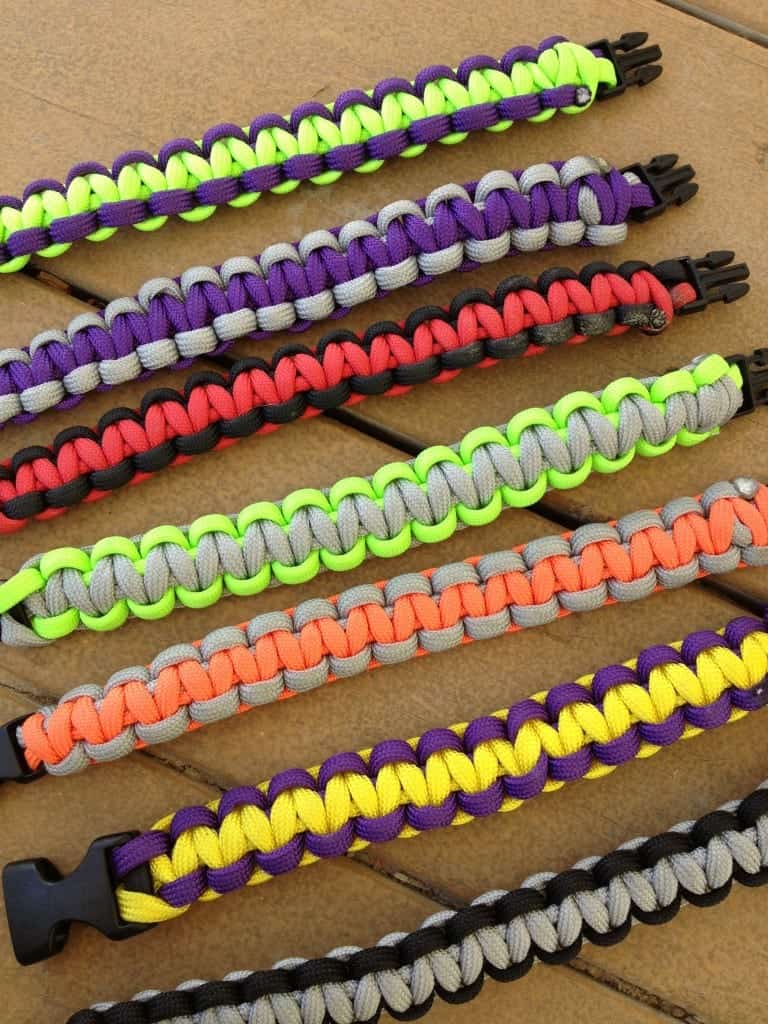
6. you are going to immediately start the braiding…the first one is super tricky cause you have to hold the clasp and make sure it doesn’t move…i always do this first on for my kids just to make sure…but picture 6 is how you want your bracelet to look…
let’s move on how to braid it!!!
if you have ever done friendship bracelets this will be pretty easy for you!
when doing two colors you need to make sure two things. you always start with the same color…(like i will always start with my light blue one) and that the clip is always on the same side…it will be twisted if you don’t (it can be fixed though!)
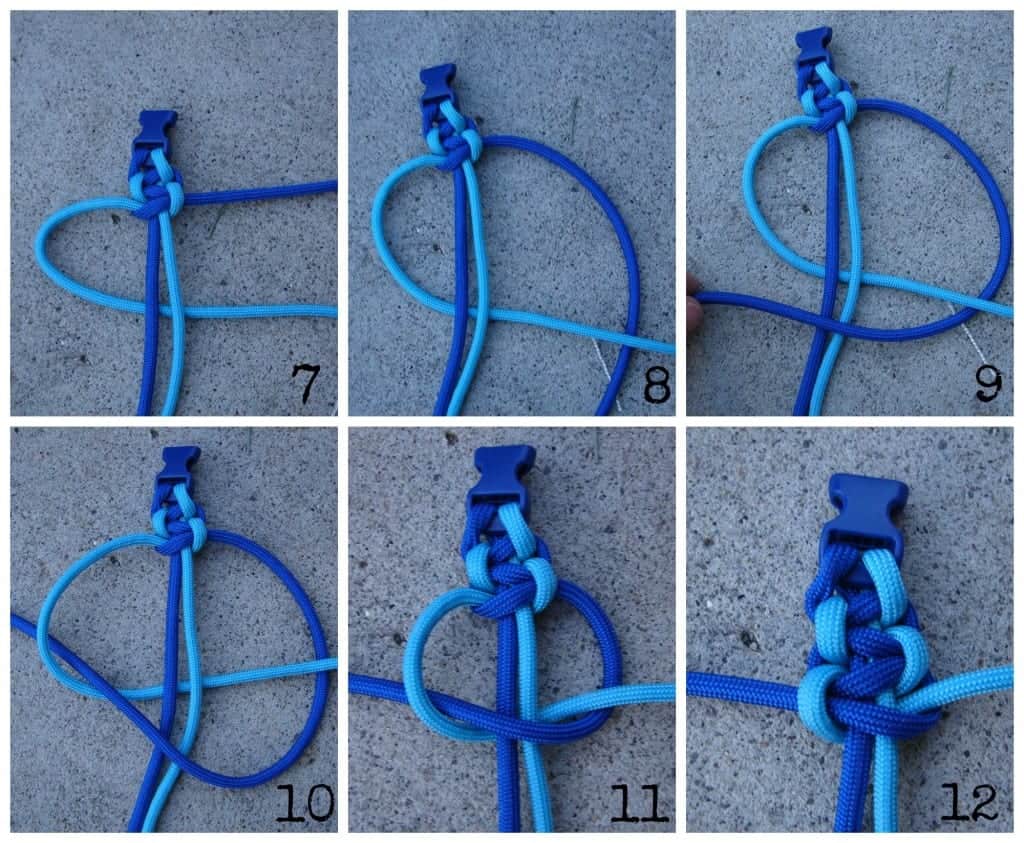
7. you make a loop (light blue) and put it behind the two middle pieces.
8. the dark blue on the other side goes behind the light blue piece you just brought over.
9 and now that dark blue piece goes up over the two middle pieces
10 and down the loop you just made
11. then slowly pull both sides up
12 until nice and tight
and repeat!
14 –make loop (remember…always start with the same color) so my light blue is now on the right and i make a loop and put it behind to the other side
15. then under …over …and through.
pull up and tighten.

16. repeat repeat repeat.
when you get the end..and if you still have cord…you can usually shove up the braided part to make it nice and tight and fit a few more braids.
(if it doesn’t look right..unbraid to the point it got messed up and do it again…
17…when you are out of string or room.. check to make sure it fits your wrist. if it doesn’t  fit…..you need to unravel it all the way and start at the beginning (step 4) (think of it as awesome practice)
if it fits you are going to snip off the excess of one color..and melt the end
18 .and take your finger(or stick) and melt it into the braid.
(turn over and repeat with the other color!) make sure they are nice and melted!
(i save the ends if they are longer than a foot–cause you could make a little keychain thing with them!)
if you stayed with one color and made sure the clasp stayed on the same side the whole time you will have one color on the inside all the way down…and if you flip it over –that same color will be the outside pieces…


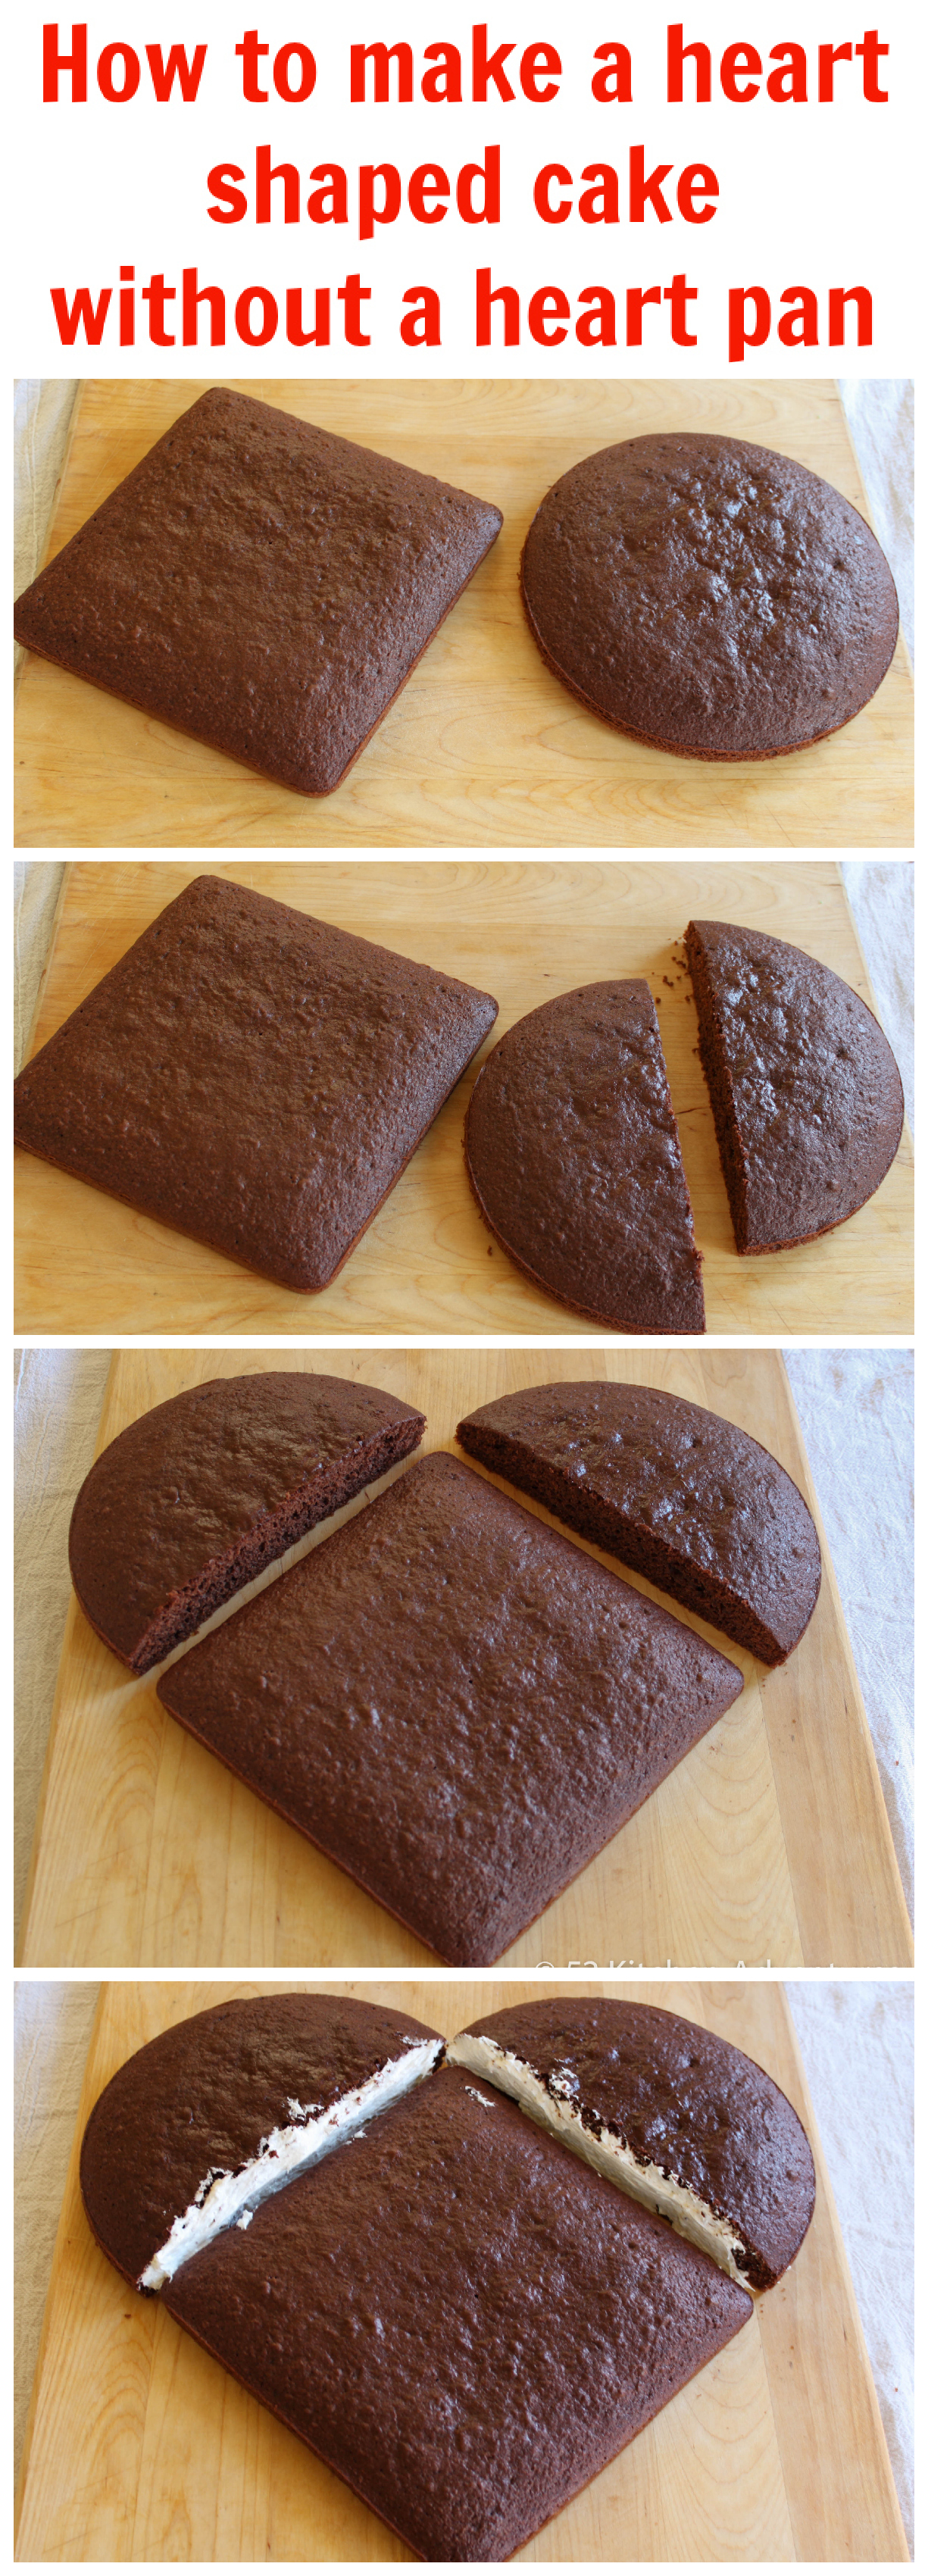
How to Make a Heart Cake (you will need only one minute)


Here is an awesome way to surprise your family,or your girlfriend/boyfriend
i hope you will like it

How to Make Perfect Homemade Pizza


How to Make Perfect Homemade Pizza


We as a world, and particularly as a nation, love our pizza. America alone eats about 350 slices of pizza every second. Despite our infatuation with the dish, pizza remains synonymous with delivery, take-out, or standard restaurant fare. This needs to change.

 Over the past few years I’ve been experimenting with countless different pizza recipes, trying different crusts, sauces, and toppings. This article is a summation of all that I’ve learned and it’s a plea to get people to try the delicious pizzeria quality pies that can be made in college apartment kitchens.Here are some of my core tips to making the perfect homemade pizza and some of my basic recipes for homemade dough and sauce.

 Tip 1: Get that oven HOT. Crank up your oven to its highest temperature which is usually around 520 and cook your pizza on the lowest possible shelf position (ovens are hotter on the bottom).Tip 

2: Don’t spread too much sauce on your pizza. Use less of a stronger flavored sauce to prevent your pizza from becoming soggy. 

Tip 3: Use bread flour to make the dough. Bread flour has a higher protein content than its all-purpose cousin and will therefore make a crispier crust. 

Tip 4: Use un-shredded cheese and cut it yourself. Shredded cheese has anti-caking agents that don’t allow it to melt as well. Even better, use fresh mozzarella cheese for a truly pizzeria quality experience.

The Dough
Prep Time: 15 minutes (with 1 hour for rising)
Cook Time: 0 hours
Total Time: 1 hour 15 minutes
Servings: 4 pizzas
Ingredients:
  • 4 cup bread flour
  • 1 teaspoon salt
  • 1 tablespoon sugar
  • 1 ½ cup very warm water
  • 1 envelope fast acting yeast
  • 3 tablespoon olive oil
Directions:
1. Stir together the yeast, water, and sugar and let sit for five minutes.
2. Combine the flour, salt, olive oil, and yeast mixture in a large bowl.
3. Mix the dough thoroughly and switch to your hands once the dough has started to come together. Knead this dough for about ten minutes, adding more flour if the dough seems too sticky (you might have to add up to a cup of additional flour). The dough should feel tacky but shouldn’t stick to your fingers.
4. Let the dough rise in a lightly oiled bowl, covered, for at least 1 hour.

The Sauce

Prep Time: 5 minutes
Cook Time: 0 hours
Total Time: 5 minutes
Servings: 4 pizza's worth

  • 1 14.5-oz. can diced or crushed tomatoes
  • 2 teaspoon red pepper flakes
  • 2 cloves garlic
  • 1 pinch salt
  • 2 tablespoon balsamic vinegar (optional)
Directions:
1.Blend all the ingredients together with a food processor. You can manually mince all the ingredients and use crushed tomatoes if you don’t have a food processor.

The Final Assembly

  1. Preheat the oven to the highest possible baking temperature.
  2. Flatten out the dough on a lightly floured surface using the heel of your hand. Press down in the center to keep a raised crust along the edges.  Flatten and stretch the dough with your hands until it is about 1/4 inch in thickness. Transfer the dough to a baking sheet.
    #SpoonTip: Make sure the dough is well floured enough to slide freely on the sheet.
    3. Spread the sauce on top of the pizza. Use a brush or your fingers to lightly oil the crust area.
    4.Put your toppings on the pizza. 
     5.Bake for 12-17 minutes on the lowest shelf until the crust is very well browned and crispy.

  ENJOY IN IT


How to Make Pancakes from Scratch

How to Make Pancakes from Scratch

Put away the Bisquick and suprise the whole family with this ultimate pancake recipe.


Here is an super easy way to create a pancakes here is how:

Pancake Recipe Ingredients
1. (2 cups all-purpose flour)
2. (2 ½ tsp baking powder)
3. (½ tsp salt)
4. (1 egg, beaten lightly)
5 (1 ½ cups milk)
6. (2 tbsp butter, melted)

Sift together first three ingredients (to prevent lumps). In a separate bowl, mix egg and milk, then add it to flour mix, stirring until just smooth. Then stir in butter. If you want to mix it up, throw in blueberries, a tiny dice of apple, or bits of banana. Grease a griddle or nonstick pan with cooking spray or a little vegetable oil. Heat pan on medium for about ten minutes. Pour batter to form pancakes of whatever size you like. Cook first side until bubbles form on top, about three minutes; then flip and cook other side until it, too, is brown, about two minutes. Serve immediately with butter and syrup or hold briefly in warm oven. Serves four.


How to make Cheap & Easy Chocolate Cake


Cake ingredients:
5 oz Self raising flour
1 oz Cocoa
6 oz Sugar (caster, granulated, golden caster all fine)
6 oz Marg (or softened butter)
2 Eggs (medium or large, doesn't matter as you'll weigh
them
-
medium are
cheaper!)
Splash of milk
1 tsp Baking powder
2 oz Dark chocolate (optional but awesome)
1 tsp Coffee granules dissolved in 1tbsp boiling water
(optional but awesome)
1. Preheat the oven for 170C for a fan oven, or 180C if not.
Using a medium sized bowl a
dd the ingredients in this order: self
-
raising flour, cocoa, baking
powder, sugar, marg, eggs, milk. Weigh the eggs, adding milk to make them up to 6 oz.
2. Using an electric whisk, mix it all together, starting on a slow speed (beware getting covered in
flour!) and then increasing the speed. Whisk together for about 2
-
3 minutes, and see the mixture
get paler and smoother in texture.
3. Melt the chocolate in the microwave, for 30 seconds at a time. Stirring in between each
heating. Should take about a mi
nute in total.
4. Mix the coffee granules with boiling/hot water.
5. Fold the coffee into the mixture, followed by the chocolate. (Just make sure you don't add them
together
-
chocolate does not like water, even water with coffee in!) Fold in gently
until the
chocolate is completely mixed in. Don't worry if you end up with some little lumps of chocolate
-
you won't be able to tell once you've baked it.
6. Grease and line two 6" or 7" cake tins with greaseproof paper. Divide the mixture between
them a
nd put into the oven for 25 minutes. After that time if you poke them with a knife, the
knife should come out clean, and then should bounce back if you press with a finger.
7. Leave in the tins for 10 minutes or so, then run a knife around the edge of ea
ch tin and tip the
cake out onto a cooling rack and leave to cool for at least 1 hour.
Icing ingredients:
2 oz Marg/Butter
1.5 oz dark or milk chocolate (You don't need to be exact on this!)
300g (ish) icing sugar
3 tbsp (ish) water
1. Put the m
arg and chocolate into a bowl and microwave for 1 min, checking and stirring after 30
seconds.
2. Once the mixture is melted, add about 100g icing sugar and stir until fully mixed. If the mixture
is very stiff, add some of the water.
3. Continue to add
icing sugar and small amounts (about 1 tbsp at a time) of water, keep beating
in between each addition. Stop once you have the right consistency and texture and once it tastes
great.
4. Spread on top of sponges

How to Make a Laser Pointer

How to Make a Laser Pointer 


Materials:
1.Plastic tube
2.Wire
3.Push button
4.Laser diode
5.Button cell batteries
6.Spring


Step 1.
Hollow out he empty tube and  remove the end

Step 2.
Get a drillbit a bit  smaller than a diode
And then drill hole in the cap
Now the diode should fit sung
Or you may need to add glue
Step 4.
Bend the pins on the push button flat
Step 5.
Cut a groove in the tube for the whire
Step 6.
Attach the negative wire to one side
Attach the negative wire of the diode to the push button as well
Attach the positive wire of the diode to the spring
the whole circuit should be similar  like this

Step 7.
Put the batteries on the tube and put cap on
Step 8.
Tick the wire under the batery(negative side)


And Thats all you are ready to go